In Python decorators are a useful tool for changing the behaviour of functions without modifying the original function. For a recent release of openapi-SQLAlchemy, which added support for references among table columns, I used decorators to de-reference columns. I needed a way of supporting cases where a reference to a column was just a reference to another column. The solution was to essentially keep applying the decorator until the column was actually found.
What is a Column Reference?
If you are not familiar with openapi specifications, a simple schema for an object might be the following:
components:
  schemas:
    Employee:
      description: Person that works for a company.
      type: object
      properties:
        id:
          type: integer
          description: Unique identifier for the employee.
          example: 0
        name:
          type: string
          description: The name of the employee.
          example: David Andersson.
To be able to re-use the definition of the id property for another schema, you can do the following:
components:
  schemas:
    Id:
      type: integer
      description: Unique identifier for the employee.
      example: 0
    Employee:
      description: Person that works for a company.
      type: object
      properties:
        id:
          $ref: "#/components/schemas/Id"
        name:
          type: string
          description: The name of the employee.
          example: David Andersson.
In this case, the id property just references the Id schema. This could be done for other property definitions where the same schema applies to reduce duplicate schema definitions.
The Simple Case
The openapi-SQLAlchemy package allows you to map openapi schemas to SQLAlchemy models where an object becomes a table and a property becomes a column. The architecture of the package is broken into a factory for tables which then calls a column factory for each property of an object. The problem I had to solve was that ,when a reference is encountered, the column factory gets called with the following dictionary as the schema for the column (for the id column in this case):
{"$ref": "#/components/schemas/Id"}
instead of the schema for the column. Apart from doing some basic checks, what needs to happen is that the schema of Id needs to be found and the column factory be called with that schema instead of the reference. A perfect case for a decorator! The following is the code (minus some input checks):
_REF_PATTER = re.compile(r"^#\/components\/schemas\/(\w+)$")

def resolve_ref(func):
    """Resolve $ref schemas."""

    def inner(schema, schemas, **kwargs):
        """Replace function."""
        # Checking for $ref
        ref = schema.get("$ref")
        if ref is None:
            return func(schema=schema, **kwargs)

        # Retrieving new schema
        match = _REF_PATTER.match(ref)
        schema_name = match.group(1)
        ref_schema = schemas.get(schema_name)

        return func(schema=ref_schema, **kwargs)

    return inner
The first step is to check if the schema is a reference schema and call the column factory if not (lines 3-4). If it is a reference, then the referenced schema needs to be retrieved (lines 14-16) and the factory called with the referenced schema instead (line 18).
The Recursive Case
The problem with the simple decorator is that the following openapi specification is valid:
components:
  schemas:
    Id:
      $ref: "#/components/schemas/RefId"
    RefId:
      type: integer
      description: Unique identifier for the employee.
      example: 0
    Employee:
      description: Person that works for a company.
      type: object
      x-tablename: employee
      properties:
        id:
          $ref: "#/components/schemas/Id"
        name:
          type: string
          description: The name of the employee.
          example: David Andersson.
Noe that the Id schema just references the RefId schema. When this schema is used, the column factory would now be called with:
{"$ref": "#/components/schemas/RefId"}
That looks a lot like the original problem! The solution is that the decorator needs to be applied again. This also looks like a case for recursive programming. In recursive programming, you have the base case and the recursive case. The base case sounds a lot like the code that checks for whether the schema is a reference (lines 3-4 above). The recursive case needs to take a step towards the base case and apply the function again. In this case this is done by resolving one reference and then calling the decorator again. This means that on line 18 above we need to somehow apply the decorator again. The solution is actually quite simple, the code needs to be changed to the following:
_REF_PATTER = re.compile(r"^#\/components\/schemas\/(\w+)$")

def resolve_ref(func):
    """Resolve $ref schemas."""

    def inner(schema, schemas, **kwargs):
        """Replace function."""
        # Checking for $ref
        ref = schema.get("$ref")
        if ref is None:
            return func(schema=schema, **kwargs)

        # Retrieving new schema
        match = _REF_PATTER.match(ref)
        schema_name = match.group(1)
        ref_schema = schemas.get(schema_name)

        return inner(schema=ref_schema, schemas=schemas, **kwargs)

    return inner
The change is that inner is called instead of the original function func. We then also need to pass in all the required arguments for inner, which in this case, means passing through the schemas which func does not need.
Conclusion
Recursive decorators combine the ideas behind decorators and recursive programming. If the problem a decorator solves can be broken into steps where, after each step, the decorator might need to be applied again, you might have a case for a recursive decorator. The decorator must then implement a base case where the decorator is not applied again and a recursive case where one step is taken towards the base case and the decorator is applied again.
The first alpha version of openapi-SQLAlchemy has been released! It is basically what I wrote about in the post on Reducing API Code Duplication. The project is available on PyPI here: openapi-SQLAlchemy. To read more documentation and about how to use the project you can visit the GitHub repository.
One of the basic principles of good software engineering is the DRY principle – Don’t Repeat Yourself. It means that information should only exist in one place and should not be repeated elsewhere. This leads to code that is easier to maintain since any change only has to be made once, among a range of other benefits.
Practicing the principle is harder than stating it. For example, in the case of an API that is supported by a database, chances are there are overlaps between the database and API schema.
In my experience, there usually is significant overlap between the schema that is defined in the database and the schema that is returned by the linked API. Changes to the database schema might accidently not be properly propagate to the API schema or the API interface documentation might not get updated.
A popular tool for exposing a database schema to a Python application is the SQLAlchemy library. This is usually achieved by defining a models.py file with classes that map to tables in the database. For one of the API endpoints you might retrieve some of these objects from the database, apply some business logic to them and then return them through the API interface.
To communicate to your users how to interact with your API, you might write an openapi specification. You could even go further and use tools like connexion to map endpoints to Python functions for fulfilment. One part of that openapi specification is to define the returned schema of each endpoint.
To get closer to fulfilling the DRY principle you might wish that there was some way to connect the SQLAlchemy models and openapi schema so that you only have to define the schema in one place. To fulfil that wish I started an open source package called openapi-SQLAlchemy.
The aim of the package is to accept an openapi specification and simplify creating the SQLAlchemy models file. The aim for the MVP is the following. Given an openapi specification, when it is read into a python dictionary and passed to the module, a model factory is returned. That model factory can be called with the name of a schema which returns a class that is a valid SQLAlchemy model. For example:
# example-spec.yml
openapi: "3.0.0"

info:
  title: Test Schema
  description: API to illustrate openapi-SQLALchemy MVP.
  version: "0.1"

paths:
  /employee:
    get:
      summary: Used to retrieve all employees.
      responses:
        200:
          description: Return all employees from the database.
          content:
            application/json:
              schema:
                type: array
                items:
                  "$ref": "#/components/schemas/Employee"

components:
  schemas:
    Employee:
      description: Person that works for a company.
      type: object
      properties:
        id:
          type: integer
          description: Unique identifier for the employee.
          example: 0
        name:
          type: string
          description: The name of the employee.
          example: David Andersson.
        division:
          type: string
          description: The part of the company the employee works in.
          example: Engineering
        salary:
          type: number
          description: The amount of money the employee is paid.
          example: 1000000.00
      required:
        - id
        - name
        - division
Normally the following models.py file would be required.
from sqlalchemy.ext.declarative import declarative_base
from sqlalchemy import Column, Integer, String, Float


Base = declarative_base()


class Employee(Base):
    """
    Person that works for a company.

    Attrs:
        id: Unique identifier for the employee.
        name: The name of the employee.
        division: The part of the company the employee works in.
        salary: The amount of money the employee is paid.

    """
    __tablename__ = "employee"
    id = Column(Integer, primary_key=True, autoincrement=True)
    name = Column(String, index=True, nullable=False)
    division = Column(String, index=True, nullable=False)
    salary = Column(Float, nullable=False)
As you can see there is a lot of duplicate information. The aim is to instead pass the specification to openapi-SQLAlchemy and reduce the models.py file to the following:
from yaml import loads
from sqlalchemy.ext.declarative import declarative_base
from openapi_sqlalchemy import ModelFactory


Base = declarative_base()
with open("example-spec.yml") as spec_file:
    SPEC = yaml.load(spec_file)
model_factory = ModelFactory(base=Base, spec=SPEC)


Employee = model_factory(name="Employee")
There is significantly less duplicate information across the specification and models file. The name of the object (Employee) is repeated a few times, although this can be viewed as a reference which means that it is acceptable.
Whilst things like whether a column is nullable can be derived from the required property of the object, there are some additional pieces of information that have to be included in the specification file. For example, not every schema must be a table. Also, the primary key, auto increment and index column modifications are not currently recorded in the specification. The final Employee schema might look like the following.
    Employee:
      description: Person that works for a company.
      type: object
      x-tablename: employee
      properties:
        id:
          type: integer
          description: Unique identifier for the employee.
          example: 0
          x-primary-key: true
          x-autoincrement: true
        name:
          type: string
          description: The name of the employee.
          example: David Andersson.
          x-index: true
        division:
          type: string
          description: The part of the company the employee works in.
          example: Engineering
          x-index: true
        salary:
          type: number
          description: The amount of money the employee is paid.
          example: 1000000.00
      required:
        - id
        - name
        - division
There are more column modifiers that would need to be supported, such as the unique constraint. There are also more column types, such as foreign keys, and there is also inheritance and references that will need to be supported. All of these need to be supported whilst also ensuring that the specification remains valid.
This problem does not seem to be difficult to achieve in Python. There are also some opportunities to use some Python tricks to reduce the amount of code that needs to be written. As I develop this package I expect to write updates on progress and also write articles on some of the Python tricks.
connexion is a great tool for building APIs in Python. It allows you to make the openAPI specification define input validation that is automatically enforced, maps API endpoints to a named function and handles JSON serialising and de-serialising for you.
One of the things to keep in mind when using connexion is that, if you have defined query parameters, only the query parameters that you have define can every get passed to the functions handling the endpoint. For example, consider the following API specification for retrieving employees from a database: specification.yml
# specification.yml
openapi: "3.0.0"

info:
  title: Sample API
  description: API demonstrating how to check for optional parameters.
  version: "0.1"

paths:
  /employee:
    get:
      summary: Gets Employees that match query parameters.
      operationId: library.employee.search
      parameters:
        - in: query
          name: join_date
          schema:
            type: string
            format: date
          required: false
          description: Filters employees for a particular date that they joined the company.
        - in: query
          name: business_unit
          schema:
            type: string
          required: false
          description: Filters employees for a particular business unit.
        - in: query
          name: city
          schema:
            type: string
          required: false
          description: Filters employees for which city they are working in.
      responses:
        200:
          description: Returns all the Employees in the database that match the query parameters.
          content:
            application/json:
              schema:
                type: object
                properties:
                  first_name:
                    description: The first name of the Employee.
                    type: string
                  last_name:
                    description: The last name of the Employee.
                    type: string
If you call /employee with some_parameter, you don’t receive an error because connexion will not call your function withsome_parameter as it is not defined as a query parameter in the specification and hence gets ignored. To help prove that, consider the following project setup.
Project Setup
The above specification.yml is included in the root directory. The library folder is also in the root directory. Inside the library folder is the following __init__.py file: library/__init__.py
pytest is used to test the API. To help with the API tests, pytest-flask is used. To show that calling the /employee endpoint with parameters that aren’t in the specification does not result in an error, the following test configuration is placed in the root directory: conftest.py
For now, focus on the app fixture which uses the standard connexion API setup and then yields the flask application. Through the magic of purest-flask, we can then define the following test to demonstrate that the API can be called with parameters not named in the openAPI specification:
def test_some_parameter(client):
    """
    GIVEN a value for some parameter
    WHEN GET /employee is called with the some_parameter set to the some parameter value
    THEN no exception is raised.
    """
    client.get('/employee?some_parameter=value 1')
Verifying Endpoint Parameter Names
This means that making a mistake with the query parameter names in the openAPI specification and the arguments for the function that handles the endpoint can go undetected. To check this is not the case, you could come up with a number of tests that only pass if the query parameter was correctly passed to the search function. This can be tedious without mocking the search function as you would have to create tests with just the right setup so that the effect of a particular query parameter is noticed.
There is an easier way with mocks. Unfortunately, it is not as easy as monkey patching the search function in the body of a test function. The problem is that, after the app fixture has been called, the reference to the search function has been hard coded into the flask application and will not get affected by mocking the search function. It is possible to retrieve the reference to the search function in the flask application instance, but you will have to dig fairly deep and may have to use some private member variables, which is not advisable.
Instead, let’s take another look at the contest.py file above. The trick is to apply a spy to the search function before the app fixture is invoked. The reason a spy rather than a mock is used is because the spy will be in p0lace for all tests and we may want to write a test where the real search function is called! With a spy the underlying function still gets called, which it does not if a mock is used instead of the search function. The fixture on lines 8-12 adds a spy to the search function. To ensure that it gets called before the app fixture, the app fixture takes it as an argument, although it doesn’t make use of the fixture. Because the app fixture is a session level fixture, we also want the fixture that sets up the spy to be a session level fixture, otherwise all the tests will be slowed down. However, this means that the spy state will leak into other tests. This can be solved with a fixture similar to the fixture on lines 15-19 which resets the spy state before each test.
Now we can use the test client to define tests that check that each of the query parameters is passed to the search function. The tests that perform these checks may look like the following: test.py
# test.py
"""Endpoint tests for /employee"""


def test_some_parameter(client, mocked_search):
    """
    GIVEN library.data.employee.search has a spy and a value for some parameter
    WHEN GET /employee is called with the some_parameter set to the some parameter value
    THEN library.data.employee.search is called with no parameters.
    """
    client.get('/employee?some_parameter=value 1')

    # Checking search call
    mocked_search.assert_called_once_with()


def test_join_date(client, mocked_search):
    """
    GIVEN library.data.employee.search has a spy and a date
    WHEN GET /employee is called with the join_date set to the date
    THEN library.data.employee.search is called with the join date.
    """
    client.get('/employee?join_date=2000-01-01')

    # Checking search call
    mocked_search.assert_called_once_with(join_date='2000-01-01')


def test_business_unit(client, mocked_search):
    """
    GIVEN library.data.employee.search has a spy and a business unit
    WHEN GET /employee is called with the business_unit set to the business unit
    THEN library.data.employee.search is called with the business unit.
    """
    client.get('/employee?business_unit=business unit 1')

    # Checking search call
    mocked_search.assert_called_once_with(business_unit='business unit 1')


def test_city(client, mocked_search):
    """
    GIVEN library.data.employee.search has a spy and a city
    WHEN GET /employee is called with the city set to the city
    THEN library.data.employee.search is called with the city.
    """
    client.get('/employee?city=city 1')

    # Checking search call
    mocked_search.assert_called_once_with(city='city 1')
You now have a starting point for how to test that the function arguments and query parameter names in the specification match. You may not want to create these tests for each query parameter for every endpoint, especially if a query parameter is required, as an exception will be raised because the underlying function will be called with a query parameter which is not listed in the function signature.
Functions that map a value from one form to another are useful since you can separate the mapping logic from things like services and components which are best kept as simple as possible. This allows for easy tests where you can check a range of conditions which might take a lot more boilerplate code if the logic was embedded in a component or service. It also allows you to re-use the mapping.
This does lead to simpler test cases, but because they are so simple the test boilerplate can become repetitive and overwhelm what is actually being tested. In practice, these types of tests are often copied and pasted which can lead to more maintenance overhead or outdated commentary around tests. To illustrate, consider the following mapping function.
Transformating Function
The following function takes in a number and returns numbers based on a series of conditional checks. transform.ts
// transform.ts
export function transform(value: number): number {
  if (value === undefined) {
    return 0;
  }
  if (value === null) {
    return 0;
  }
  if (value < 0) {
    return -1;
  }
  if (value === 0) {
    return 0;
  }
  return 1;
}
Traditional Tests
To test the function you might come up with cases where the input is undefined, null, -10, -1, 0, 1 and 10. Those seem reasonable given the checks and boundaries in the tests. This would result in something like the following test file. transform.spec.ts
// transform.spec.ts
import { transform } from './transform';

describe('transform', () => {
  describe('input value is undefined', () => {
    it('should return 0', () => {
      expect(transform(undefined)).toEqual(0);
    });
  });

  describe('input value is null', () => {
    it('should return 0', () => {
      expect(transform(null)).toEqual(0);
    });
  });

  describe('input value is -10', () => {
    it('should return -1', () => {
      expect(transform(-10)).toEqual(-1);
    });
  });

  describe('input value is -1', () => {
    it('should return -1', () => {
      expect(transform(-1)).toEqual(-1);
    });
  });

  describe('input value is 0', () => {
    it('should return 0', () => {
      expect(transform(0)).toEqual(0);
    });
  });

  describe('input value is 10', () => {
    it('should return 1', () => {
      expect(transform(10)).toEqual(1);
    });
  });

  describe('input value is 1', () => {
    it('should return 1', () => {
      expect(transform(1)).toEqual(1);
    });
  });
});
The key pieces of information in the tests is that undefined and null map to 0, negative numbers map to -1, 0 maps to 0 and positive numbers map to 1. Compare that simple sentence to 43 lines of code required to implement the tests.
Lines 7 to 13 clearly demonstrate the expected input to output mapping. Lines 15-19 demonstrate how the mapping is achieved. The forEach loop takes advantage of object destructing to assign an object from the array to parameters of the testing function on line 14. The describe and it functions are passed arguments that include the input and expected value, which makes reading and understanding the output of failed tests easier, on lines 15 and 16, respectively.
There are drawbacks to parametrizing tests and, in a lot of cases, can make tests confusing. In this case, the parameters and code to execute the test fit on the same page in a code editor, which makes it easy to understand. There are also few input parameters and the test logic is simple.
When the number of input parameters gets large, it makes the test harder to read because you have to jump back and forth between the parameter definition and the test code. If the test code is longer and complex, introducing parameters increases the complexity of the test even further. If parametrizing the test means you have to significantly increase the logic of the test, it means the test is hard to understand when you come back to it a few months down the track.
However, with few input parameters and a function for which little test logic is required, using parametrised tests reduces boilerplate code and makes the tests easier to understand. TypeScript also helps as it will infer the types of the input and expected parameters for you.
Testing functions in Python that have a decorator applied to them is not ideal as the tests have to be written to take into account the decorator. The testing guard decorator can help remove the problem by selectively running the function with or without the decorator by detecting the environment in which it is run. When you make the decorator a part of your project you might like to write tests for the testing guard decorator itself.
Testing Guard Decorator
As a reminder, the following is the decorator code for the testing guard.
# testing_guard.py
"""Demonstrates a guard decorator."""

import os


def testing_guard(decorator_func):
    """
    Decorator that only applies another decorator if the appropriate
    environment variable is not set.

    Args:
        decorator_func: The function that applies the decorator.

    Returns:
        Function that dynamically decides whether to apply the decorator based
        on the environment.
    """
    def replacement(original_func):
        """
        Function that is used as the decorator function instead of the
        decorator function.

        Args:
            original_func: The function being decorated.

        Returns:
            Function that dynamically picks between the original and
            decorated function depending on the environment.
        """
        # Creating decorated function
        decorated_func = decorator_func(original_func)

        def apply_guard(*args, **kwargs):
            """
            Dynamically picks between decorated and original function based on
            environment.
            """
            if os.getenv('TESTING') is not None:
                # Use original function
                return original_func(*args, **kwargs)
            # Use decorated function
            return decorated_func(*args, **kwargs)

        return apply_guard

    return replacement
The key pieces of functionality are on lines 39-43. Line 39 is the check for whether the function is being executed in the testing environment. If it is, the original function is called without the decorator on line 41. If it isn’t, then the decorated function is called on line 43. The key reason that the decorator works is that it gets access to both the decorator and original function and that it gets to run code every time the decorated function is run.
Testing the Testing Guard Decorator
There are 2 scenarios to test. The first is that the decorator is executed in the test environment, and the second is when it is executed in the non-test environment. In both cases we care about both that the correct function is called with the correct arguments (and that the other function is not called) and that the return value from the correct function is returned.
Let’s first define 2 fixtures that will help during testing. We will repeatedly need some generic *args and **kwargs and the particular value we choose for either doesn’t add anything to help understand the tests themselves so it is better to hide that detail in a fixture.
@pytest.fixture(scope='session')
def args():
    """Generates function *args"""
    return ('arg1', 'arg2')


@pytest.fixture(scope='session')
def kwargs():
    """Generates function **kwargs"""
    return {'kwargs1': 'kwarg1', 'kwarg2': 'kwarg2'}
Test Environment
When the decorator is executed in the test environment, it should call the original function and return the return value of the original function. It should not call the decorator return value. To focus the tests, let’s split those into three separate tests.
The first test just checks that the decorator return value is not called:
def test_testing_guard_set_decorated_call(monkeypatch):
    """
    GIVEN TESTING environment variable is set and mock decorator
    WHEN decorator is applied to a function after decorating it with the
        testing guard and calling the decorated function
    THEN decorator return value is not called.
    """
    # Setting TESTING environment variable
    monkeypatch.setenv('TESTING', '')
    # Defining mock decorator
    mock_decorator = mock.MagicMock()

    # Decorating with testing guard and calling
    guarded_mock_decorator = testing_guard(mock_decorator)
    # Applying decorator
    mock_decorated_func = guarded_mock_decorator(mock.MagicMock())
    # Calling function
    mock_decorated_func()

    # Checking decorator call
    mock_decorator.return_value.assert_not_called()
To understand the test, some understanding of Python decorators is required. A decorator is another function whose return value replaces the function it is decorating. A decorator could, for example, return the print function and then the function being decorator would never be called. In most cases, however, the function being decorator is called in the body of the function the decorator returns.
On line 9 of the test the testing environment is setup. On line 11 a mock function that will serve as the decorator to which the testing guard is applied is defined. On line 14 the testing guard is applied to the mock decorator. Then a mock function is decorated with guarded mock decorator on line 16 and the decorated function is called on line 18. On line 21 it is checked that the return value of the decorator, which would usually be called instead of the original function, is not called since, in the testing environment, the original function should always be called.
The next test checks that the original function is called with the correct arguments. For this we will ned the args and kwargs fixtures.
def test_testing_guard_set_func_call(monkeypatch, args, kwargs):
    """
    GIVEN TESTING environment variable is set, mock function and args and
        kwargs
    WHEN a decorator is applied to the function after decorating it with the
        testing guard and calling the decorated function with args and kwargs
    THEN function is called with args and kwargs.
    """
    # Setting TESTING environment variable
    monkeypatch.setenv('TESTING', '')
    # Defining mock decorator
    mock_func = mock.MagicMock()

    # Decorating with testing guard and calling
    mock_decorator = mock.MagicMock()
    guarded_mock_decorator = testing_guard(mock_decorator)
    # Applying decorator
    mock_decorated_func = guarded_mock_decorator(mock_func)
    # Calling function
    mock_decorated_func(*args, **kwargs)

    # Checking decorator call
    mock_func.assert_called_once_with(*args, **kwargs)
This tests is very similar to the first test but, instead of keeping track of the decorator, the original function is defined on line 12. The procedure on lines 14-20 is very similar to the first test with the only difference being that the mock decorated function is called with the args and kwargs fixtures. On line 23 the original function call is checked.
The final test checks the return value of the mock decorated function call. It is much like the previous test, except that it doesn’t pass in any args nor kwargs.
def test_testing_guard_set_return(monkeypatch):
    """
    GIVEN TESTING environment variable is set and mock function
    WHEN a decorator is applied to the function after decorating it with the
        testing guard and calling the decorated function
    THEN the return value is the function return value.
    """
    # Setting TESTING environment variable
    monkeypatch.setenv('TESTING', '')
    # Defining mock function
    mock_func = mock.MagicMock()

    # Decorating with testing guard and calling
    mock_decorator = mock.MagicMock()
    guarded_mock_decorator = testing_guard(mock_decorator)
    # Applying decorator
    mock_decorated_func = guarded_mock_decorator(mock_func)
    # Calling function
    return_value = mock_decorated_func()

    # Checking decorator call
    assert return_value == mock_func.return_value
Non-Test Environment
The second series of tests are outside the test environment. Since the tests for the testing guard are likely running inside the test environment, it is usually best to deactivate the testing environment as a part of the test as you may want to have the testing environment active by default during your tests.
The tests are very similar to the tests in the test environment. The difference is that now the decorator return value should be called, the original function should not be called and the return value of the decorator return value should be returned. The tests are shown below.
def test_testing_guard_not_set_decorated_call(monkeypatch, args, kwargs):
    """
    GIVEN TESTING environment variable is not set, mock decorator and args and
        kwargs
    WHEN decorator is applied to a function after decorating it with the
        testing guard and calling the decorated function with args and kwargs
    THEN decorator return value is called with args and kwargs.
    """
    # Removing TESTING environment variable
    monkeypatch.delenv('TESTING', raising=False)
    # Defining mock decorator
    mock_decorator = mock.MagicMock()

    # Decorating with testing guard and calling
    guarded_mock_decorator = testing_guard(mock_decorator)
    # Applying decorator
    mock_decorated_func = guarded_mock_decorator(mock.MagicMock())
    # Calling function
    mock_decorated_func(*args, **kwargs)

    # Checking decorator call
    mock_decorator.return_value.assert_called_once_with(*args, **kwargs)


def test_testing_guard_not_set_return(monkeypatch):
    """
    GIVEN TESTING environment variable is not set and mock decorator
    WHEN decorator is applied to a function after decorating it with the
        testing guard and calling the decorated function
    THEN the return value is the decorator's return value return value.
    """
    # Removing TESTING environment variable
    monkeypatch.delenv('TESTING', raising=False)
    # Defining mock decorator
    mock_decorator = mock.MagicMock()

    # Decorating with testing guard and calling
    guarded_mock_decorator = testing_guard(mock_decorator)
    # Applying decorator
    mock_decorated_func = guarded_mock_decorator(mock.MagicMock())
    # Calling function
    return_value = mock_decorated_func()

    # Checking decorator call
    assert return_value == mock_decorator.return_value.return_value


def test_testing_guard_not_set_func_call(monkeypatch):
    """
    GIVEN TESTING environment variable is not set and mock function
    WHEN a decorator is applied to the function after decorating it with the
        testing guard and calling the decorated function
    THEN function is not called.
    """
    # Removing TESTING environment variable
    monkeypatch.delenv('TESTING', raising=False)
    # Defining mock decorator
    mock_func = mock.MagicMock()

    # Decorating with testing guard and calling
    mock_decorator = mock.MagicMock()
    guarded_mock_decorator = testing_guard(mock_decorator)
    # Applying decorator
    mock_decorated_func = guarded_mock_decorator(mock_func)
    # Calling function
    mock_decorated_func()

    # Checking decorator call
    mock_func.assert_not_called()
This demonstrates how to test the testing guard. The setup and teardown of your test environment might be more complicated in which case your tests would have to reflect that.
The service with a subject pattern is a good entry point into the RxJS world of observables in Angular. When you are using RxJS, writing traditional tests can be cumbersome. There are great tools, such as jasmine-marbles, that help make these kinds of tests a lot easier. A great way to get started with jasmine-marbles is testing the service with a subject when the service only performs HTTP calls. However, when the service also accepts updates from components, writing these tests can be more difficult as you have to bridge the gap between the timing of function calls and observables.
The Service under Test
To illustrate a starting point for how to write these kinds of tests, consider a service that supports a component that allows the user to pick the sauce they would like to have on their burger 🍔. You might come up with a sauce service to keep track of which sauce was picked, such as the one shown below. sauce.service.ts
There are two things you may be interested in testing. The first is that the initial sauce is set correctly and the second is that, on calling setSauce, that the new sauce is emitted by sauce$. Both of these can be tested using jasmine-marbles. Without jasmine-marbles, you would have to subscribe to sauce$, check that the correct sauces are emitted and make use of the done function. With jasmine-marbles this can be simplified.
To see how, you need to understand that the jasmine-marbles cold function simply creates an observable. Just like any other observable, you can subscribe to it. So if you define an observable that emits the sauces that you want to call setSauce with using cold, subscribe to that observable and call setSauce with the sauces that you receive, you have bridged the gap between function calls an observables. The marble syntax allows you to specify the timing of the setSauce calls. The tests could like like what is shown below. sauce.service.spec.ts
The test on lines 15-22 checks that the initial sauce is emitted after construction. The interesting test is on lines 26-39. On line 28 the timing of the setSauce calls is defined. In this case, it is setup so that the first setSauce call occurs one frame after the construction is complete. On lines 32-33 the input to the setSauce call is defined and the plumbing to perform the setSauce calls is specified. On lines 36-37 the standard work is being done to check the values emitted by sauce$.
This technique is more concise and easy to understand than messing around with observables, subscriptions and the done function. There are still things that could be better. For example, it would be great if jasmine-marbles could come up with a standardised way of performing this technique (maybe they already have and I just don’t know about it). You may not feel like using this technique all the time, depending on the complexity of the logic and its dependence on timing. However, knowing about it and how it helps you can be valuable when you encounter the need for finer control over timing of function calls in tests.
Previously, you had an idea to move a spreadsheet from an email trail onto a website. To achieve that, you used an Angular Material Basic Spreadsheet. You showed it to your manager and he thought it had potential if you add a few more features. Before going ahead with that, you realise that, to achieve complexity scale, you will have to start writing some tests.
As a reminder, the key elements of the Angular Material Basic Spreadsheet are the component that displays individual orders. This component is used by an Angular Material table based table component that maps a number of orders onto the screen similar to a spreadsheet based on the date and product of the order, as shown below.
// order.component.ts
import { Component, OnInit, Input } from '@angular/core';

import { Order } from './order.model';

@Component({
  selector: 'app-order',
  templateUrl: './order.component.html',
  styleUrls: ['./order.component.css']
})
export class OrderComponent implements OnInit {
  @Input() order: Order;

  constructor() { }

  ngOnInit() {
  }

}
<!-- order.component.html -->
<ng-container *ngIf="order">{{ order.value | number }}</ng-container>
To figure out the tests that need to be written, let’s think about what could go wrong. Firstly, we could have forgotten to import something or setup something incorrectly. Next, we could have assumed that anyone that uses the component will always pass in an order. Thirdly, when an order is passed in, we could have forgotten to use the number pipe to display the value. The following specification tests for those three cases. order.component.spec.ts
// order.component.spec.ts
import { TestBed, ComponentFixture } from '@angular/core/testing';

import { OrderComponent } from './order.component';
import { DebugElement } from '@angular/core';

describe('OrderComponent', () => {
  let fixture: ComponentFixture<OrderComponent>;
  let component: OrderComponent;
  let debugElement: DebugElement;

  beforeEach(() => {
    TestBed.configureTestingModule({
      declarations: [OrderComponent]
    });

    fixture = TestBed.createComponent(OrderComponent);
    component = fixture.componentInstance;
    debugElement = fixture.debugElement;
  });

  it('should create', () => {
    fixture.detectChanges();
    expect(component).toBeTruthy();
  });

  describe('order null', () => {
    it('should display empty template.', () => {
      // Setting order to null
      component.order = null;

      // Triggering change detection
      fixture.detectChanges();

      // Checking template
      expect(debugElement.nativeElement.textContent).toEqual('');
    });
  });

  describe('order not null', () => {
    it('should display order value formatted as number.', () => {
      // Setting order to null
      component.order = {date: '2000-01-01', product: 'product 1', value: 1000};

      // Triggering change detection
      fixture.detectChanges();

      // Checking template
      expect(debugElement.nativeElement.textContent).toEqual('1,000');
    });
  });
});
On lines 8-20 the standard setup for component tests is defined. The test on lines 22-25 checks that the component is created. The test on lines 27-38 checks what happens if the input Order is null. Finally, the test on lines 40-51 checks that the Order value is displayed using the number pipe.
Here the DebugElement is used to inspect the template. Since the template is relatively simple, we only ever check the text content of the whole template under the different test cases.
The table component is more complex and will require more tests. Broadly, there are tests for the component class and for the template. The main test for the component class is that the getOrderTable function is called on initialisation. Ideally, component code is tested without the use of the TestBed as it tends to slow down tests. However, since the component code to be tested is linked to an Angular event (OnInit), in this case it is better to use the TestBed and, therefore, the standard Angular lifecycle functions. The template tests are complex due to the number of ngIf statements and other logic in the template. Additionally, there are some complexities testing Angular Material tables. The following is the test code that checks common cases. order-table.component.spec.ts
The test setup is done on lines 23-41. The tests on lines 43-76 check the code of the component. The tests on lines 78-286 check the template under a range of scenarios.
Test Setup for Angular Material Table
There are a few interesting pieces to highlight for the tests. As the OrderTemplateComponent has a dependency on the OrderComponent, it needs to be given to the TestBed along with the OrderTableComponent. For testing, it is better to define a mock implementation of the component rather than use the real component, which is done on lines 10-20.
At the time of writing, the DebugElement does not work with the Angular Material table. This means that, to figure out exactly which OrderComponent is displayed in a cell, we need to make use of the template. Each OrderComponent displays an Order. Therefore, it should be enough to display all the member variables of the Order in the template of the mock OrderComponent to know that the correct Order was passed.
Since the template of the OrderTableComponent makes use of the Angular Material table, we need to pass in the MatTableModule to the TestBed.
Component Code Tests
The tests on lines 43-76 check that the component can be constructed and that the getOrderTable function is called on the OrderService during component initialisation. In this case, the component create test is a little more complicated because the OrderService needs to be called during initialisation which means that the getOrderTable function must at least exist. Also, during the initialisation, the headers member variable is used on the returned value of getOrderTable, so we may as well return an empty OrderTable.
Component Template Tests
The main reason for the length of the tests are the definition of the OrderTable to display in each test. There is a trade off between pre-defining or repeatedly defining them in each test. In production code brevity is preferred, so it is often better to define a range of OrderTables and importing them. However, for tests, it is better to have a single test be as much of a complete story as is needed to understand the test. As what is displayed in the template is tightly linked to the OrderTable, there are significant advantages to explicitly stating the OrderTable in each test.
The test scenarios are an empty table, a single item table and tests where either multiple columns or rows are displayed. In each case, the headers and rows are checked.
With these tests you have made an important step towards being able to scale up the complexity of the website. Now it is time to work on additional features! The most important feature request your manager has made is to make the spreadsheet editable so that people can revise the orders that were placed over time.
Spreadsheets are the lifeblood of many organisations. For example, a fruit company might be keeping track of the number of orders for Apples and Oranges over time using a spreadsheet. To scale, the organisation might have chosen to create 2 teams, one that looks after orders for Apples and the other for Oranges. Management wants a wholistic view of orders, so it instructs you to gather sales of Apples and Oranges from the two teams and aggregate the sales in a single spreadsheet. A trail of emails starts with many attached spreadsheets to keep track of the sales. Arguments ensue on whether the spreadsheet was updated correctly, who updated it and when.
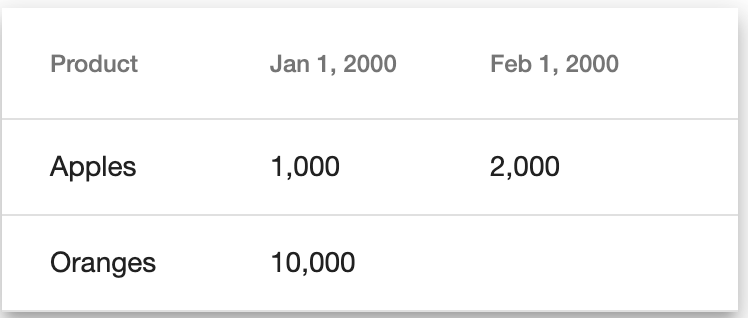
What if there is a simpler solution? You decide to try building an internal website that keeps track of the sales. As a starting point, you only want the website to display orders broken down by product (Apples and Oranges) and date. You decide to try to use work that other people have already done for you. In particular, you decide to use @angular/material. To focus your mind on what you want to achieve, you draw up a draft of what you would like the website to look like:
Draft of what the website should look like.
Order Model
The first step is to define a model for an order. A simple model would keep track of the product, the date of the order and the amount that was ordered. order.model.ts
// order.model.ts
export class Order {
    date: string;
    product: string;
    value: number;
}
Displaying the Order
To get a feeling for the model, you decide to write a component that can display a single Order. For now, it will be fairly basic and only display the value of the order, formatted as a number. order.component.ts order.component.html
// order.component.ts
import { Component, OnInit, Input } from '@angular/core';

import { Order } from './order.model';

@Component({
  selector: 'app-order',
  templateUrl: './order.component.html',
  styleUrls: ['./order.component.css']
})
export class OrderComponent implements OnInit {
  @Input() order: Order;

  constructor() { }

  ngOnInit() {
  }

}
The component code is simple, it just accepts an Order as input.
In the template, you decide to check whether the order is truthy (ie. it has actually been passed in) using the *ngIf statement on line 2 and only display the value in that case.
Order Table Model
You anticipate the need to display multiple orders in a table. This table needs to be displayed by the Angular Material table component. To keep the template as simple as possible, you decide to use the following table model. order-table.model.ts
// order-table.model.ts
import { Order } from './order.model';

export class OrderTable {
    headers: string[];
    rowLabels: string[];
    orders: Order[];
    orderMap: {[header: string]: {[rowLabel: string]: Order}};
}
It is designed to keep track of the orders in the table using the orders member variable. The ordering of the headers and rows is defined by headers and rowLabels member variables, respectively. To link a header and row label to and Order, you use the orderMap member variable.
Order Service
As you still need to convince your management and the teams you work with that the website is a good idea, for demonstration purposes, you decide to create a service that can easily be extended in the future, but that returns a hardcoded table for now. order.service.ts
For the moment it returns 3 static orders, 2 for Apples and 1 for Oranges.
Displaying the Order Table
To be able to use @angular/material, you need to install some packages as shown in the getting started guide. To be able to use the Angular Material table, you need to import the MatTableModule and put it into the imports array of the module which will display the table.
The component code needs to make use of the OrderService to get the order table. It also needs to define the heading for the product name. The component template needs to dynamically generate headings and rows, depending on the number of Orders that need to be displayed. table.component.ts table.component.html
Line 14 defines the header under which the product will be displayed. In the component initialiser on line 20, the OrderTable is loaded. On line 21 the headers of the table are concentrated with the header for the product.
The table template is the most complicated piece of the puzzle. Line 2 defines that the data source for the table are the row labels of the table. This allows you to dynamically generate a row for each row label in the table. Line 14 defines how the header columns are defined and line 15 defines how each row puts data into the columns. Line 3 is the generator expression for each column of the table.
Lines 4-7 define how the header row is generated. Line 5 checks whether the current header is the product header, and if so displays the product header. Line 6 checks the opposite and displays the header after passing it through the date pipe.
Lines 8-11 define how the data rows are generated. Similar to the header row, line 9 checks for the product header and then displays the product. Line 10 checks for the opposite, picks out the Order based on the header and row label using the orderMap and passes on the Order to be displayed by the OrderComponent.
Now you have a working website that you can take to your management and the teams you work with as a showcase. They will probably ask you for additional features, such as being able to edit orders and add new orders to the table. To be able to deliver those more complex features, you also start thinking about how you might write tests for what you have created so far.
The Service with a Subject pattern in Angular is a good way to get started with reactive programming (ie. making use of RxJS) in Angular. The following article describes how to get started with the pattern: Getting Started with Service with a Subject in Angular.
That pattern leads to writing reactive components for which standard Angular component testing would lead to more complicated tests. With some changes to the standard Angular component testing methodologies, the tests can be simplified significantly.
Reactive Component under Test
For reference, the following is the typescript and HTML template for the component. name.component.ts
// name.service.ts
import { Injectable } from '@angular/core';
import { HttpClient } from '@angular/common/http';
import { BehaviorSubject, Observable, of } from 'rxjs';

@Injectable({
  providedIn: 'root'
})
export class NameService {
  private mName$ = new BehaviorSubject<string>(null);

  name$(): Observable<string> {
    return this.mName$;
  }

  constructor(private httpClient: HttpClient) { }

  loadName() {
    this.httpClient.get<string>('name URL')
      .subscribe(
        name => this.mName$.next(name)
      );
  }
}
To figure out what needs to be tested, let’s think about what could go wrong. There are 3 main things that are likely to go wrong. The first is that the component doesn’t even get created due to some syntactical or import error. The second is that the loadName function on the NameService doesn’t get called during initialisation. The third is that, once the NameServicename$ function emits a name, it doesn’t get displayed in the component.
Reactive Component Tests
The following is the test code that checks the 3 things that are likely to go wrong described earlier. name.component.spec.ts
import { ComponentFixture, TestBed } from '@angular/core/testing';
import { of } from 'rxjs';

import { NameService } from './name.service';
import { NameComponent } from './name.component';

describe('NameComponent', () => {
  let nameServiceSpy: jasmine.SpyObj<NameService>;
  let component: NameComponent;
  let fixture: ComponentFixture<NameComponent>;

  beforeEach(() => {
    nameServiceSpy = jasmine.createSpyObj('NameService', ['loadName', 'name$']);

    TestBed.configureTestingModule({
      declarations: [ NameComponent ],
      providers: [ { provide: NameService, useValue: nameServiceSpy } ]
    });

    fixture = TestBed.createComponent(NameComponent);
    component = fixture.componentInstance;
  });

  it('should create', () => {
    // Checking component creation
    expect(component).toBeTruthy();
  });

  it('should call loadName on NameService', () => {
    fixture.detectChanges();

    // Checking loadName call
    expect(nameServiceSpy.loadName).toHaveBeenCalledWith();
  });

  it('should display NameService name', () => {
    // Setting name in service
    nameServiceSpy.name$.and.returnValue(of('the name'));

    fixture.detectChanges();

    // Checking displayed name
    expect(fixture.debugElement.nativeElement.innerText).toEqual('the name');
  });
});
Test Setup
The setup common to all tests is on lines 8-21 which define the component under test and other supporting variables needed for he tests. Lines 13-21 define the standard TestBed initialisation and injection logic. The three test scenarios are defined on lines 24-27 (checking the component can be created), 29-34 (checking that loadName is called on NameService) and 36-44 (checking that the name emitted on name$ is displayed).
Component Setup
The test on lines 24-27 checks that the component can be setup. This is a simple test but is a very useful step for verifying that all the component plumbing is correct and that the test setup has actually worked. If this test fails it is likely because an injection is missing or because the TestBed was not setup correctly.
loadName Call
The test on lines 29-34 checks that the loadName function is called on the NameService. For the ngOnInit function to be triggered, change detection is run on line 30. Line 33 checks that loadName has been called on the NameService.
Name Display
The test on lines 36-44 checks that, when name$ on NameService emits a new name, that name is displayed in the component. Line 38 triggers emitting a new name on name$. Line 40 triggers change detection so that the name is displayed. Line 43 checks that the name is displayed in the component.
These tests are the base on which tests can be built if the logic in the component becomes more complicated. Examples of additional complications are having to pass arguments to the service loadName call, displaying data from multiple services or subjects and a more complicated template that includes conditional displaying of data.